Enter Google Tag Manager – this nifty tool from Google makes it much easier to install and track multiple pixels on your website.
Download Now: The Ultimate Guide to Link Building – 25 Actionable Strategies to Build High Quality Backlinks [Free eBook]
In this article, you’ll learn everything you need to know about Google Tag Manager. We’ll also provide step-by-step tutorials for creating two of the most essential tags in Google Tag Manager: Google Analytics and Facebook Pixel. Let’s dive in. Here’s what this guide will cover:
What is Google Tag Manager?
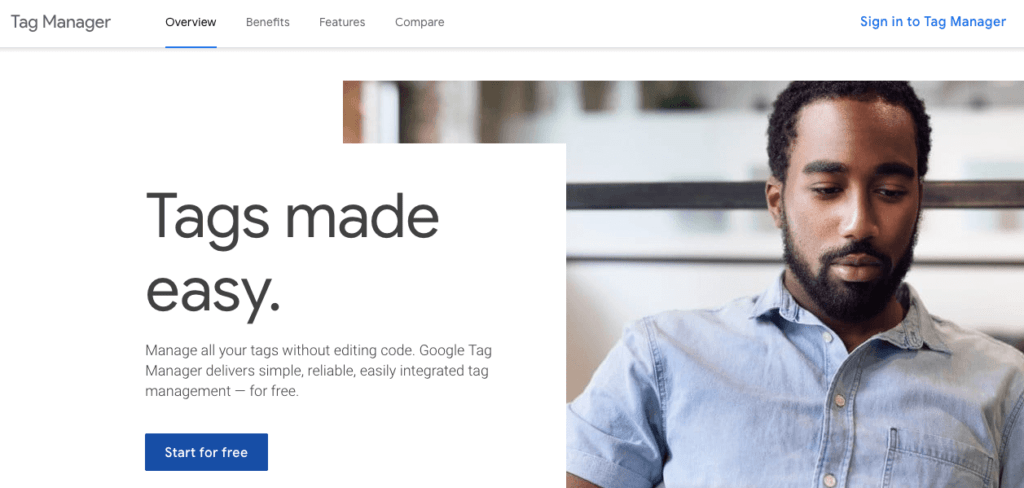
Google Tag Manager is a free tag management system which allows you to manage all your tags without editing code.
What is Google Tag Manager?How is Google Tag Manager Different from Google Analytics?Google Tag Manager Tutorial: Setup and Integration with Google AnalyticsHow to Install Facebook Pixel with Google Tag ManagerFinal Thoughts
Using Google Tag Manager, you can quickly add and update your own tags for conversion tracking, site analytics, remarketing, and more.
Here are some of the key benefits of using Google Tag Manager:
Accurate and reliable data collection Easy to use Integrated with all the major Google and third-party tags for web and mobile apps Enables efficient collaboration across your organization Saves time and keeps all your tags organized
How is Google Tag Manager Different from Google Analytics?
Image Credit: Google Marketing Platform Google Tag Manager and Google Analytics are completely different tools. Google Tag Manager is a tag management system where you can add and update different scripts and pixels to track any behaviors on a specific website and then send those behaviors to different tracking tools, including Google Analytics which then saves that data. Google Analytics is just one of the tracking tools Google Tag Manager can be integrated with. It can also be integrated with other third-party tracking tools such as comScore, CrazyEgg, Segment, LinkedIn Insight, etc.
Google Tag Manager Tutorial: Setup and Integration with Google Analytics
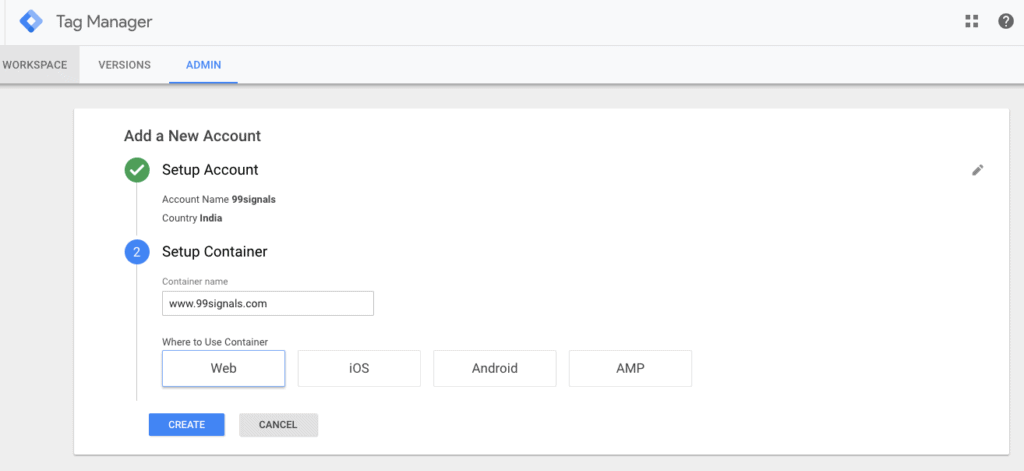
The first thing you need to do is set up a Google Tag Manager account. Follow these steps to ensure a smooth setup: Step #1: Visit the Google Tag Manager website and click the “Start for Free” button. Next, you’ll need to enter your account name, country, your website URL, and where you’d like to use your Google tag (Web, iOS, Android, AMP).
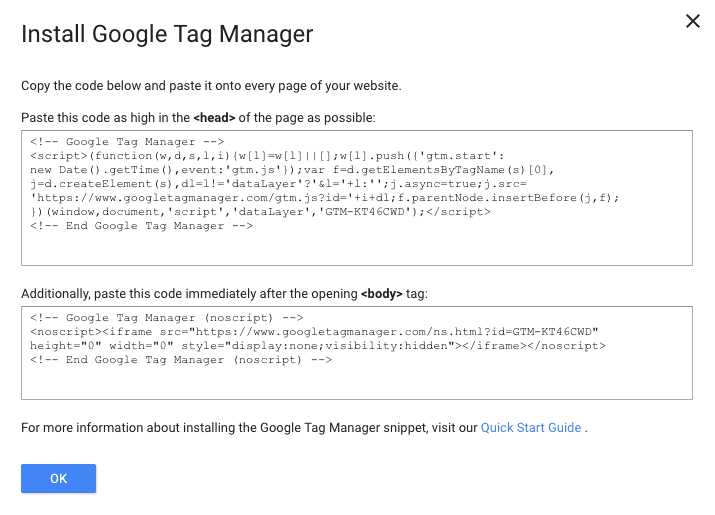
When you’re done, hit the ‘Create’ button. Step #2: Next, you’ll be shown Google Tag Manager’s Terms of Service agreement. Accept the terms and click the ‘Yes’ button. Step #3: Next, you’ll be given be given two codes: one needs to be copied and pasted high in the
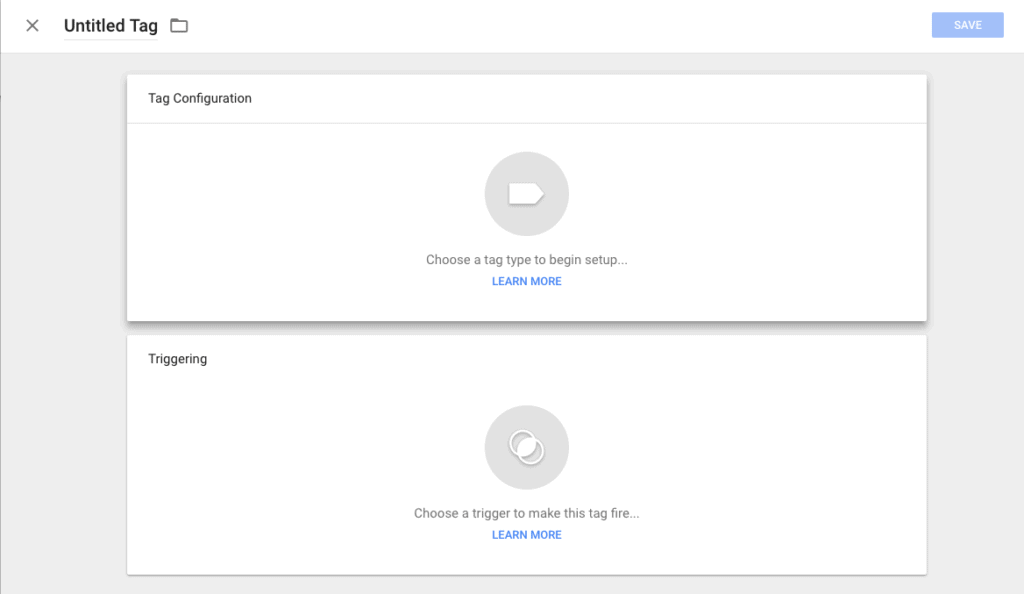
tag of your page and the other code needs to be pasted immediately after the openingtag.Once you’ve done that, click ‘Ok’. Pro Tip: If you use WordPress, then I’d highly recommend you install the free ‘Insert Headers and Footers’ plugin. This plugin lets you insert codes (including Google tag) to your site’s header and footer without the need to edit your theme files. Step #4: Now that your account is setup, you’d want to set up your first tag. From your Google Tag Manager dashboard, click the ‘Add a New Tag’ button. Then click anywhere in the ‘Tag Configuration’ box.
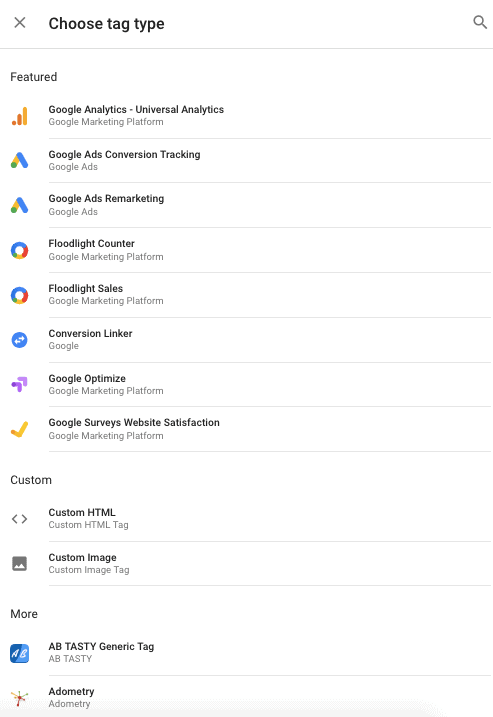
Here you’ll be shown all the available tag types, including Google tags (Google Analytics, Google Ads, etc.), custom tags (Custom HTML, Custom Image, etc.), and third-party tags (CrazyEgg, LinkedIn Insight, Bing Ads, etc.)
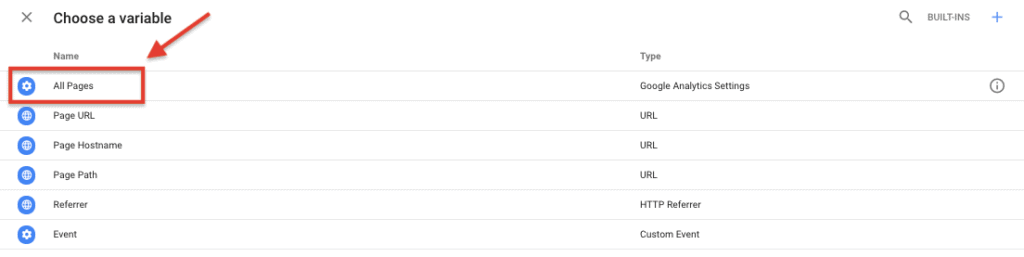
In this example, we’ll focus on tracking our tag in Google Analytics. Step #5: In the next step, select ‘Google Analytics – Universal Analytics’ as the tag type. In the new window, select ‘Page View’ as the track type from the drop-down options and then click on ‘Select Settings Variable’ -> ‘New Variable’. Here, you need to enter your Google Analytics Tracking ID. Once you’ve done that, hit the ‘Save’ button. Next, click anywhere on the Triggering box and choose a trigger. I chose ‘All Pages’ as the variable because it’ll allow me to track page views for all pages on my website.
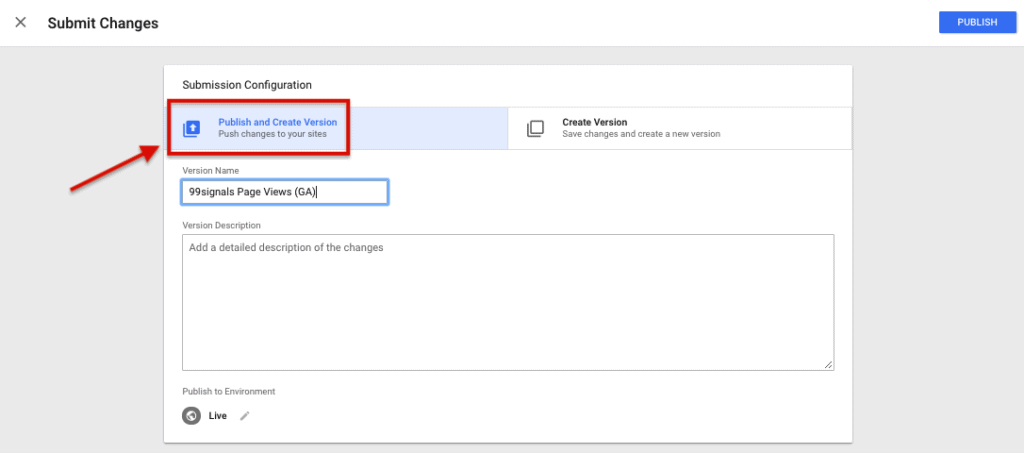
Once you’re done, hit the ‘Save’ button and rename the tag. Step #6: Click the ‘Submit’ button and you’ll be taken to the ‘Submission Configuration’ page. You’ll see two options on top: ‘Publish and Create Version’ and ‘Create Version’.
I chose ‘Publish and create Version’ because I’m ready to push my tag to all the pages on my site. Next, give a version name and description to keep your tags organized. Once you’ve done that, click the ‘Publish’ button. When you’re done, you’ll be taken to the ‘Versions’ tab where you can see the version changes, activity history, etc. Now click the ‘Workspace’ tab on top. You’ll notice that Workspace changes are back to zero which means you’ve successfully created your first tag in Google Tag Manager. Pro Tip: Once the tag is published, make sure you install a free Chrome extension called Google Tag Assistant. Once it’s installed, you can visit any page on your website to see if the tags you inserted are firing correctly.
How to Install Facebook Pixel with Google Tag Manager
Now that you’ve integrated Google Analytics with Google Tag Manager, let’s install Facebook Pixel using Google Tag Manager. The best part about Facebook Pixel integration with Google Tag Manager is that you don’t have to manually set it up as you did with Google Analytics above. Facebook will do that work for you. Just follow these steps to ensure a smooth and hassle-free integration: Step #1: Login to your Facebook account and head over to Facebook Ads Manager. From here, navigate to All Tools -> Events Manager -> Partner Integrations.
Step #2: Here, you’ll notice various integration options from five different categories. Scroll down till you find Google Tag Manager under Tag Management.
Click the ‘Google Tag Manager’ option. Facebook will open a new window where you’ll be prompted to select the Facebook Pixel you’d want to track (in case you’ve multiple pixels setup on Facebook) and connect your Google Tag Manager account.
Verify and confirm the settings, and you’re all set. It’s as simple as that. Install the free Facebook Pixel Helper Chrome extension to validate your pixel installation. Visit a few pages on your website and see if the tag is firing correctly.
Final Thoughts
As you can imagine, Google Tag Manager can be used for a lot more than just tracking your web traffic in Google Analytics. This guide was an attempt to familiarize you with the tool and to help you get started by installing two of the most necessary tags on your website. Try setting up other tags (Twitter Analytics, LinkedIn Insight, etc.) using Google Tag Manager and make the whole process of tracking traffic and conversions on your website smoother and more efficient. For additional info on Google Tag Manager and in-depth tutorials, refer to any of the resources below:
5 Ways to Capitalize on Google Tag Manager (Search Engine Land) How to Use The Google Tag Manager to Track Video Views on Your Landing Pages (Neil Patel) An Introduction to Google Tag Manager (Moz)
If you liked this article, please share it on Twitter using the link below or any other social channel using the social share bar on the left. [ctt template=”12″ link=”mj9uB” via=”yes” nofollow=”yes”]The Ultimate Guide to Google Tag Manager[/ctt]
Semrush vs Moz: Which is the Best SEO Tool? 8 Best Chatbot Platform Tools to Build Chatbots for Your Business The Increasing Influence of Dark Social (What Marketers Need to Know)

![]()
![]()
![]()